 ILLER
ILLERBuilding & managing your menu
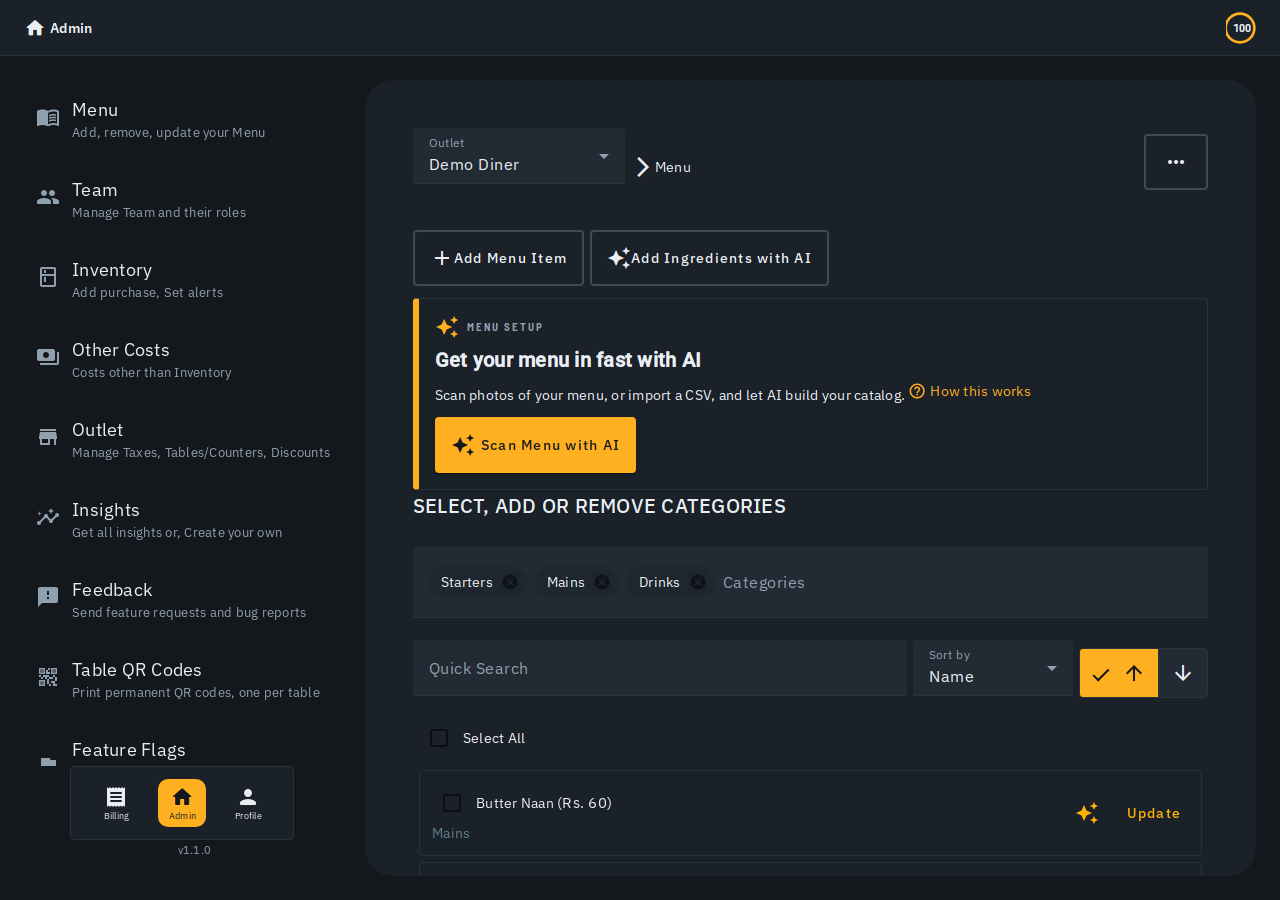
The Menu screen is your catalog of dishes -- names, prices, categories and dietary type. You can build it fast from a photo (AI scan) or add items by hand; this guide covers doing it by hand and keeping it tidy afterwards.
In a hurry to get a printed menu in? Start with Set up your menu from a photo, then come back here to fine-tune.
Adding an item by hand
- On Menu, tap Add Menu Item.
- Fill in:
- Menu Name -- e.g. "Margherita Pizza".
- Price -- e.g.
120. - Photo -- tap Upload photo to pick an image straight from your device (JPEG/PNG/WEBP, up to 5MB), or paste a link in Photo URL (optional) if you already have one hosted elsewhere. Either way, photos go through an approval step, so a newly added one shows as Pending approval -- not shown to customers yet until it's approved.
- Category -- pick an existing category from the autocomplete, or type a new name to create one (there's also an Add Category field for managing categories directly).
- Menu Type -- pick a type from the autocomplete. Biller ships with dietary types (Veg / Egg / Non-Veg), and the veg/non-veg/egg indicator shown on the item -- one icon and label, never a duplicate -- is derived from the Menu Type you choose; there's no separate veg/non-veg switch to keep in sync.
- Description -- a short, appetizing blurb. Leave it blank and Biller writes one for you with AI as soon as you save (based on the name and category); it never blocks or delays saving the item if that fails for any reason. Edit it, or tap Generate description (AI) / Regenerate description (AI) any time to write your own or get a fresh AI attempt.
- Suggest images (AI) -- once the item exists, its editor offers this button to fetch candidate photos for the dish; pick one and it's applied straight to the item (pending approval, same as any other photo -- see Approve Photos below). If it shows Not generated yet instead of photos, tap Try again -- that's a busy moment, not "no photos found".
- Tap Add.
To change an item later, tap Update on its row -- the same sheet opens with Update, Delete and Close actions.
Marking a dish out of stock
Each item has an Out of Stock toggle on its editor. Turn it on to hide a dish from ordering when you've run out, and off to bring it back. (If you use inventory recipes, Biller can also flip this on automatically when an ingredient runs out -- see Inventory & stock.)
Categories and menu types
- Categories group dishes on the menu and on the bill screen. Create one on the fly while adding an item, or manage the set from Select, Add or Remove Categories on the Menu screen (this section only appears once you have at least one category).
- Menu Types are managed from their own sheet: New Menu type, then a Menu Type Name and a Menu Icon. The built-in dietary types drive the veg/non-veg badge, as above.
- If another admin renames or deletes a Menu Type at the same moment you're saving an item under it, Biller now shows a clear error instead of saving the item with a broken type -- just reopen the item, pick the Menu Type again and save.
Working through a big menu
The Menu screen has tools for editing at scale:
- Quick Search to jump to an item by name.
- Sort by with an ascending/descending toggle.
- Select All (or tick individual items) to select several at once, then:
- Bulk Update to change category, out-of-stock state or menu type across every selected item together -- it also offers Add ingredients with AI and Suggest images (AI) scoped to just the items you selected (the same AI actions available per item, applied to your whole selection in one go). A big selection of brand-new dishes may generate only some photos in one go and mark the rest as not generated yet -- just run Suggest images (AI) again on those to pick up the remaining ones.
- Bulk Delete to remove every selected item in one confirm-first step.
- Approve Photos to review and publish pending dish photos in one place.
- Upload Menu Photo and Add Ingredients with AI for the AI-assisted flows (see AI menu scan, Import your menu from a CSV, and Add ingredients with AI).
Linking ingredients (optional)
If you track stock, the item editor has an Inventory Details section where you link the dish to inventory items and amounts, so completing a bill deducts stock automatically. See Inventory & stock.
Guided tour
The first time you open this page, a short guided tour walks through adding a dish, categories, the AI scan shortcut, search/sort, and editing an existing item. It only shows itself once; if you want to see it again (or missed it), open the "..." menu and pick Take a Tour.
What Biller doesn't do (today)
- There's no separate item-code/SKU field -- items are found by name (and Quick Search), not a code.
- Availability is a simple Out of Stock on/off -- there's no per-item time-of-day availability schedule.
Tips
- Type a brand-new category or menu-type name right in its autocomplete to create it -- you don't have to set them all up first.
- New dish photos aren't shown to customers until approved, so add them freely and clear the queue from Approve Photos when you're ready.