 ILLER
ILLERHelp
Set up your menu from a photo (AI scan)
Biller can read your paper menu straight from a photo -- no manual typing of every dish and price. Take a few photos (or upload a CSV), let AI extract the items, then review and correct anything before it becomes your real menu.
Scanning your menu
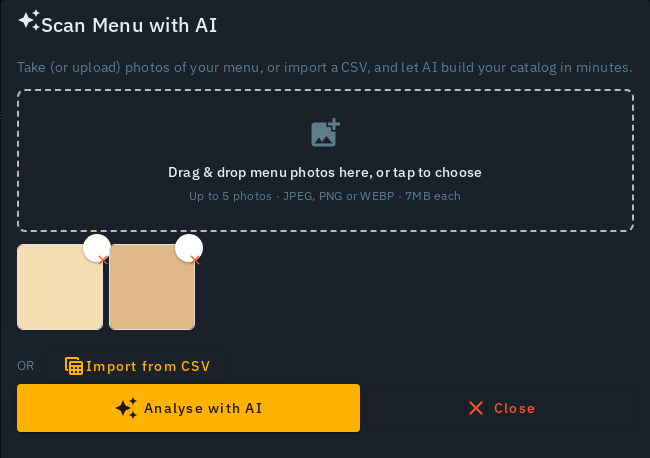
- Open Upload Menu Photo -- during first-run setup this is the featured banner on the Bills and Menu screens ("Get your menu in fast with AI"); afterwards it's the Upload Menu Photo button at the top of Menu.
- Add up to 5 photos of your paper menu (JPEG, PNG or WEBP, up to 7MB each) -- drag and drop them in, or tap the dropzone to choose files. Prefer a CSV instead? Tap Import from CSV and pick your file; it lands in the same review step below.
- Tap Analyse with AI. This step reads your photos (or CSV) and sends them off to be scanned -- it can take anywhere from a few seconds to around a minute for a full menu's worth of photos.
Reviewing what AI found
AI extraction isn't asked to be perfect -- it's asked to save you the typing, and you're expected to check its work before saving:
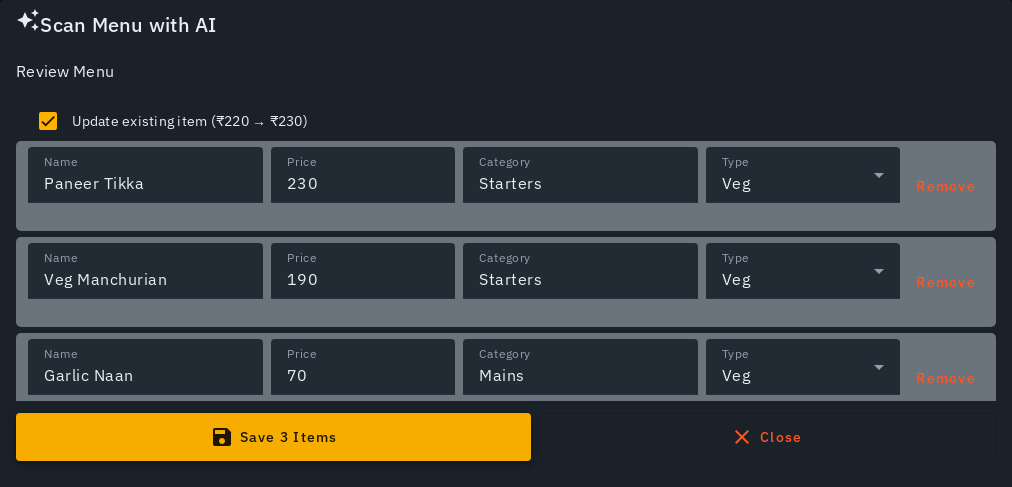
- Each extracted dish shows up as an editable row: Name, Price, Category, and Type (Veg/Non-veg). Fix anything that's wrong -- a misread price, a merged category, a dish name that didn't come out quite right.
- If a scanned item's name matches something already on your menu, that row is flagged with a price comparison (old price → new price) and an Update existing item checkbox, checked by default. Untick it if you'd rather add it as a brand-new item instead of overwriting the existing one.
- Don't want a row at all? Tap Remove on that row -- it's dropped before anything is saved.
- Happy with the list? Tap Save (or Add, if you're adding to an existing menu) to commit every remaining row to your menu.
Tips
- Nothing is saved until you tap Save/Add on the review screen. Scanning and analysing never touches your live menu on their own.
- Good, well-lit, straight-on photos of the menu page extract more accurately than a blurry or angled one -- if a scan comes out messy, retake the photo rather than fighting with the review table.
- If AI menu scanning is temporarily unavailable or the photos couldn't be read, you'll see a clear error message -- CSV import is always there as a fallback.
- Scanning is rate-limited per outlet. If you hit the limit, the error message tells you roughly how long to wait before trying again.
Adding ingredients with AI
Scanning your menu gets the dishes in; it doesn't invent ingredients or inventory on its own. Adding those is a separate, AI-suggested step you review before anything is saved -- it has its own guide: Add ingredients with AI.